Vita3K Emulator Full Setup Guide 2024

Hello, this post will show you how to download, install and set up the Vita3K emulator on Mobile and PC to play PlayStation Vita games without the original system. We will try to present it concisely so you don’t waste time on redundant content and can easily set up this application suitable for the platform you are using.
Currently, we only have one option for you to emulate the Vita system, which is the Vita3K application. Fortunately, it has great performance and high compatibility. This application supports the following platforms: Android, macOS, Windows and Linux. There is currently no information about the iOS release (According to us, it is very unlikely to happen because Vita3k uses Vulcan as primary 3d renderer, which is not available on iOS (unless ported via MoltenVK)).
Required configuration and compatibility
Not all games work, and not every game works perfectly. We recommend you check Vita3K’s compatibility list before downloading and running a game. Below is information about the required configuration for each operating system.
Android
First, you should note that Vita3K’s performance will vary depending on the device and each game. You need a fairly powerful Android device to emulate games at maximum speed. The device needs to support 64-bit and be compatible with Vulkan 1.0 (i.e. Android 7 and above). Here is the recommended configuration from the homepage:
- GPU that supports Vulkan
- GPU that supports shader interlock
- x86_64 CPU with the AVX instruction set
- 8GB of RAM or greater
Windows/ MacOS and Linux
- Windows: Windows 10 64-bit or Windows 11 64-bit. Make sure your graphics driver is updated to the latest version.
- Linux: Modern Linux distribution like Ubuntu, Fedora, or Arch Linux. Requires installing a Vulkan driver compatible with your graphics card.
- macOS: macOS 10.15 Catalina and above. Use a discrete graphics card if possible (not mandatory).
Required files
Before talking about the installation process and advanced settings for each platform, you need to download the necessary files that we will list right below. Note that they are extremely important to ensure the Vita3K application works without any issues.
Download the Vita3K emulator
Go to the official website to download the latest Vita3K application. Here, choose the version suitable for your operating system.
This website always displays and updates the latest version of the application. You can also click HERE to download older versions. We will not upload the application files as it is unnecessary.
Download original Firmware and Fonts
Like many other emulators, Vita3K requires original firmware to run games. You must download and install the firmware for this app to work. Additionally, you also need to install a Font package so the interface display of the application and games do not have errors. We have uploaded and shared the latest original firmware files and font packages. Please click the button below to download.
Download PlayStation Vita ROM files
The Vita3K emulator does not include game ROMs. Therefore, you need to dump your own games on the Vita or Vita TV (PS TV) yourself using HENkaku 3.60 – 3.65. This is impossible if you do not already have an original device. Don’t worry, there is a much simpler way that is completely free – access the PS Vita ROM library shared by ROMsFUN! We have uploaded around 98% of the original PS Vita game library with ROM files in standard VPK format. You can download all of them completely free.
Setup
The steps to install and use Vita3K are generally the same across all platforms. In this article we are installing and using Vita3k on a Windows PC so the instructions will be carried out and screenshots will be taken on this device.
Installing the Vita3K emulator
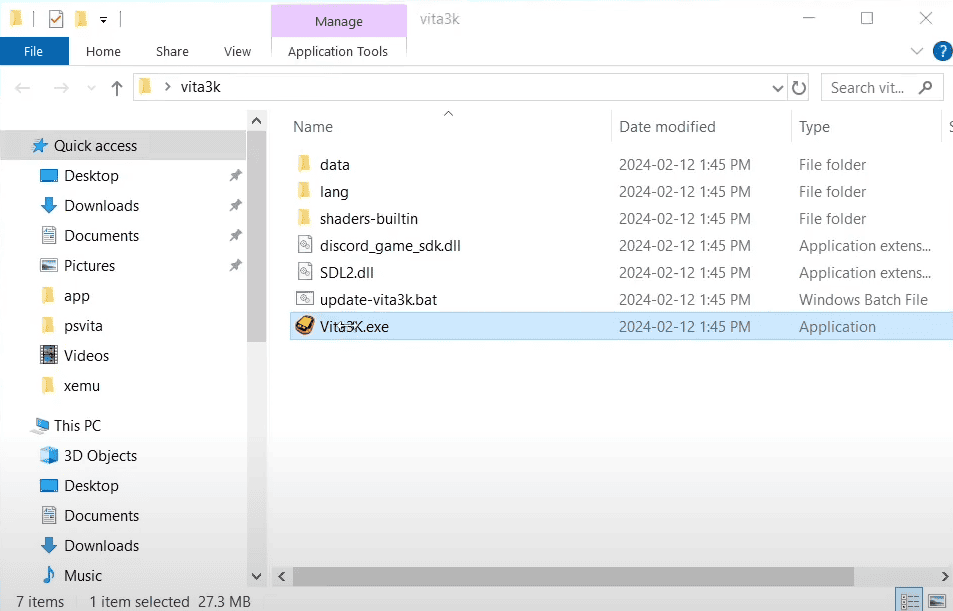
After you have downloaded the file, unzip it and run the Vita3k.exe file.
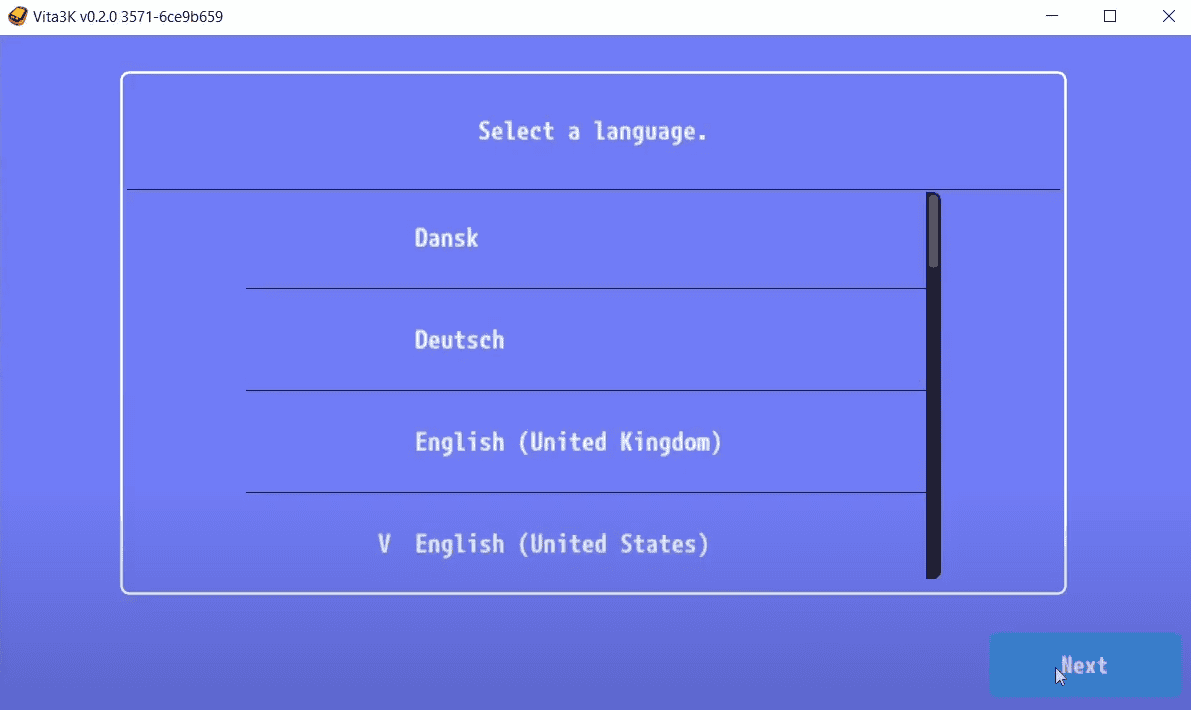
Select the interface language, then click Next.
An option allows you to change the path to the emulator’s main folder. You can change this path by selecting “Change Emulator Path“, navigating to the “Vita3K” folder, selecting the folder and pressing “Next”.

Install Firmware and Font Pack
Make sure you have downloaded the Firmware and Font files that we provided above. They are files named “PSVupd.pup” and “PSP2UPD.PUP”. Now you need to install them in order. First click on “PSVUPDAT.PUP” (this file is around 134MB in size), this is the firmware file. If you’ve done everything correctly, the firmware will automatically install. This process takes a bit of time, be patient.
Wait for a moment for the installation process to complete. It will show a notification like in the image below.
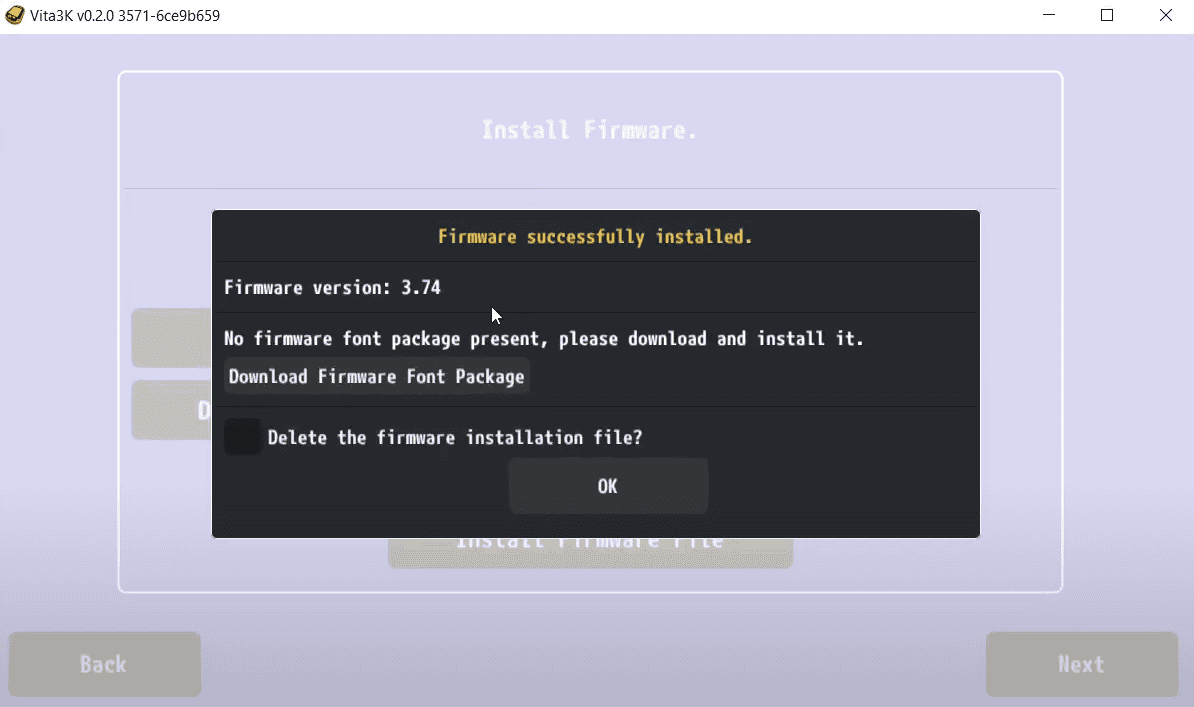
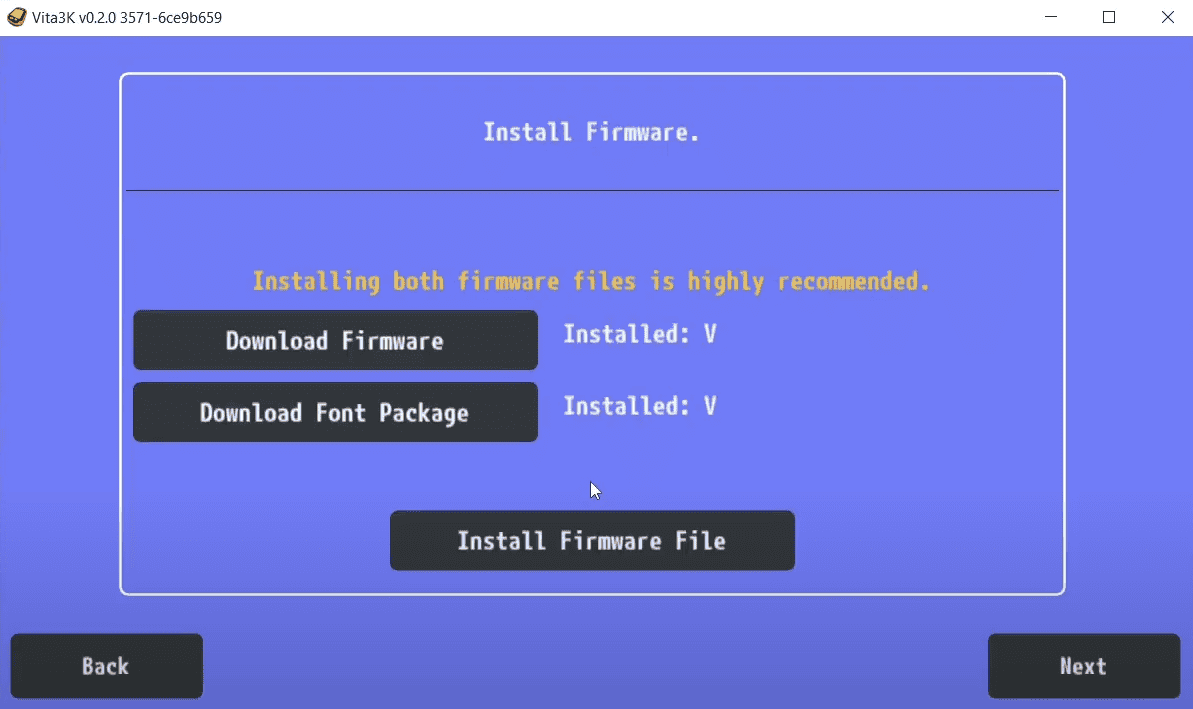
When the font package installation is complete, click “OK”. That’s it, you have completed the initial setup. Next to “Download Firmware” and “Download Font Package” it will show a “V“, meaning successfully installed. Click “Next”.
Initial Setup
Set up the application’s interface, this part is not very important so you can leave it as default and click Next.
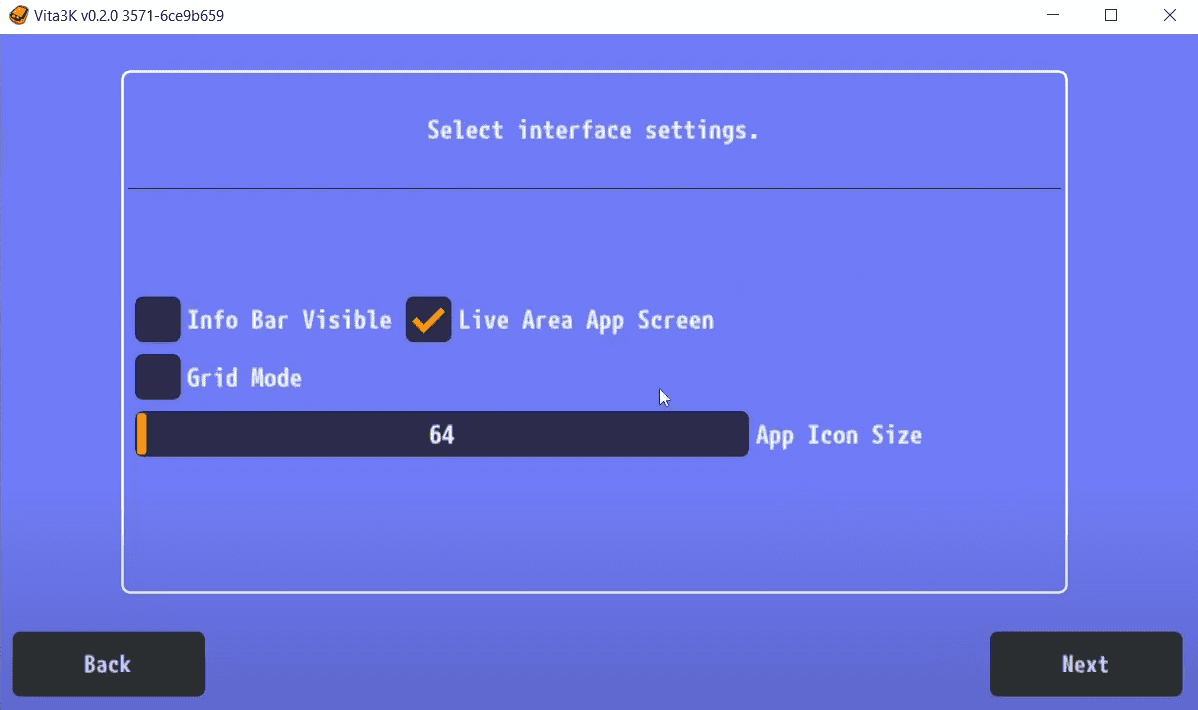
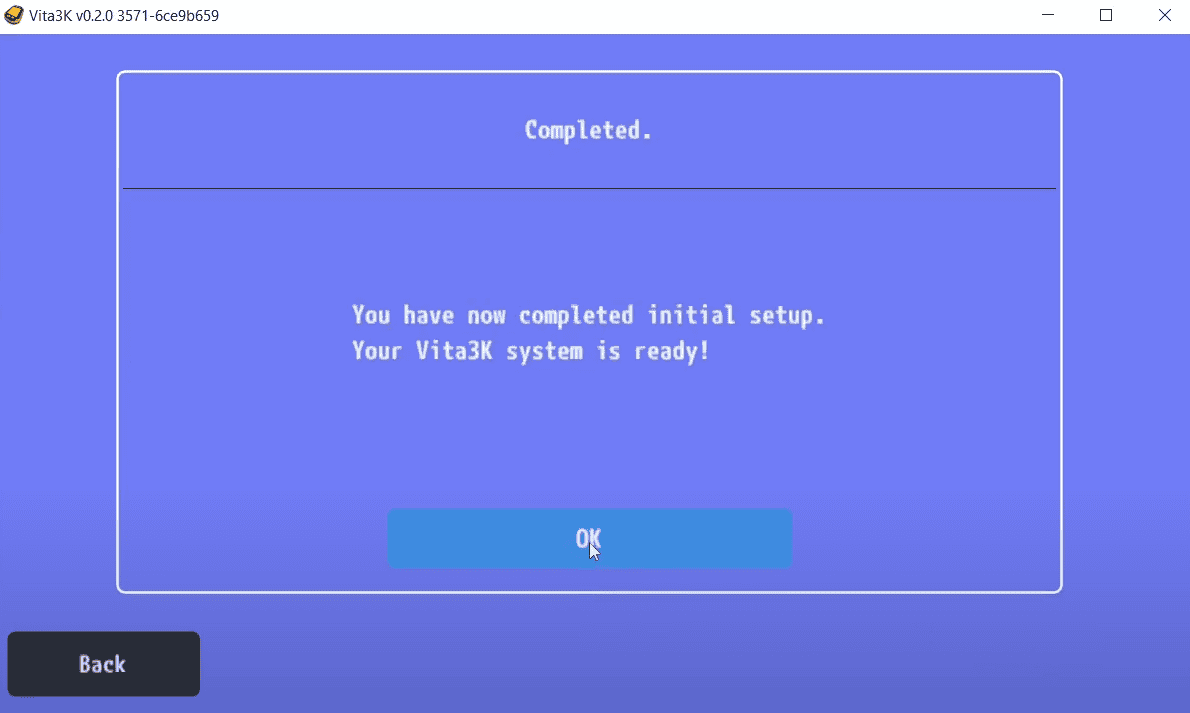
If you have set up successfully there will be a notification below. Click OK.
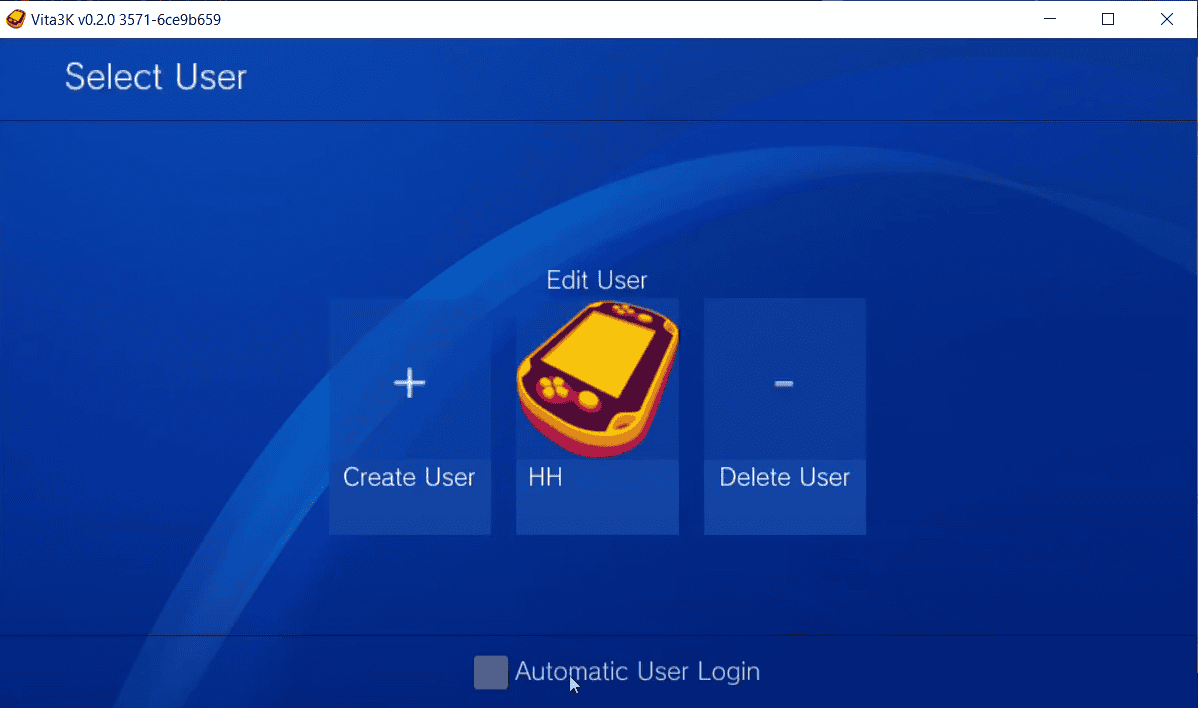
Now, you need to create a user. I will name my user “HH” and confirm. I always choose to auto login by checking the box below.
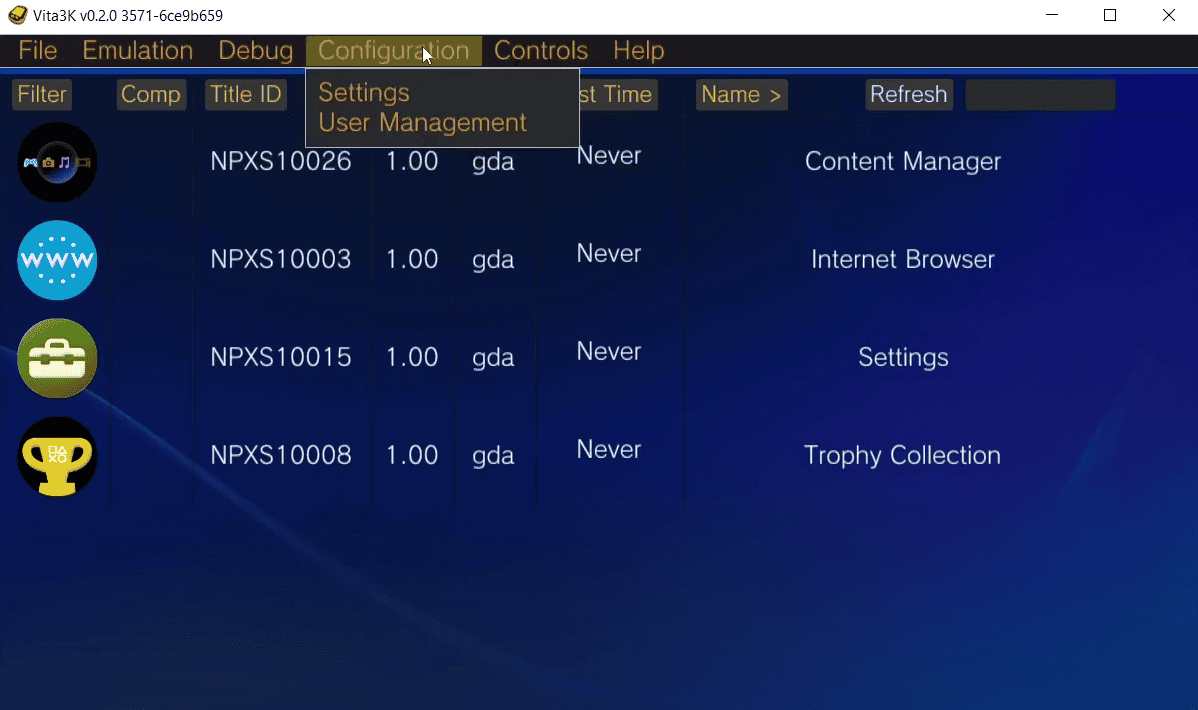
In the configuration section, I usually go to “Settings” -> “Emulator”. You can see all the options here and easily change them. The options are very clear and easy to understand so I believe you won’t have any trouble with them.
I recommend you connect a Gamepad to play games as it provides a better gaming experience. The app can automatically detect the Gamepad if you have connected it to your device. You don’t need to do anything.
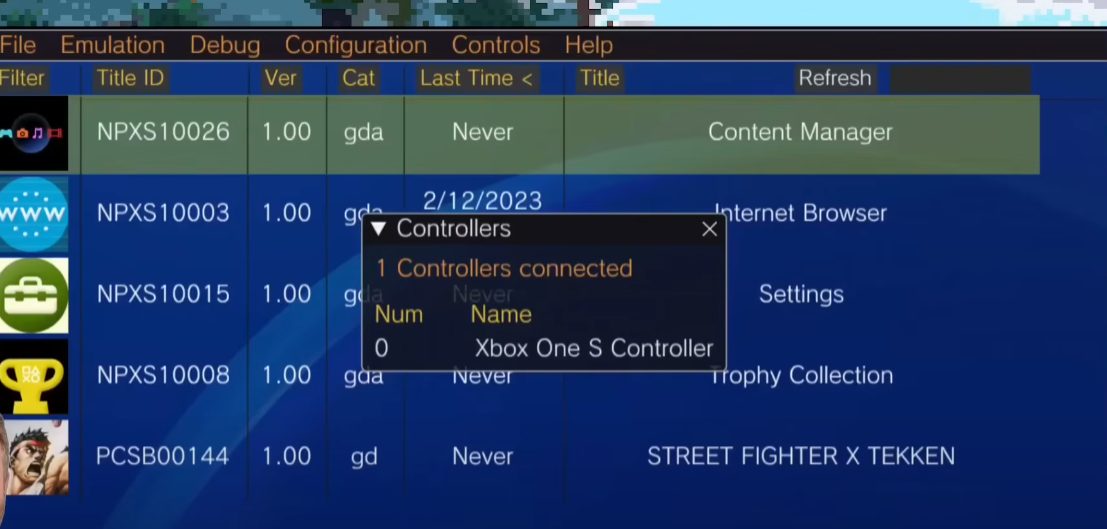
If you are using the Android version, tap Controls -> Overlay. If you are connecting via Bluetooth gamepad then untick “Show gamepad overlay in game” for a clear screen. If no gamepad, tap “Modify gamepad layout” to move and customize button positions if desired. When done, tap “Hide Gamepad Overlay”.

How to Install Game.
Installing games is quite easy however there is no option for bulk install if you have multiple ROM files. Therefore having many games and large sizes will take time and require patience. Easiest is to install game files in zip format. I will tap File, Install .zip/.vpk, select Select file and locate the game ROM file. If issues, double check the game file, ensure not raw format, you may need to unzip first.

Locate and tap the game file to install. Be patient, eventually the game will install successfully.

Once installation is complete, there will be a notification of successful installation. Press OK and the game will appear in the PS Vita menu. If not, it could be a faulty game file, try reinstalling or another game. Once a game is installed, you can tap to play immediately or further customize in settings.

Conclusion
This is our complete guide to help you download, install and use the Vita3K app to play original PlayStation Vita games on PC and Mobile. If you have any questions, feel free to leave a comment below. Don’t forget to visit Romsfun.me daily to download ROM games for all consoles.